Textured walls were once a popular interior design trend because they helped conceal imperfections and added depth to plain surfaces. However, modern home design now favors sleek, smooth finishes that create a cleaner and more elegant look. This shift has increased interest in learning how to smooth textured walls, especially among homeowners who want to upgrade their interiors without major renovations.
Understanding how to smooth textured walls can dramatically improve both the appearance and functionality of a space. Smooth walls are easier to paint, clean, and decorate, making them more practical for everyday living. Whether you are preparing your home for resale or simply updating your décor, mastering this technique can provide long-lasting visual and financial benefits.
Types of Textured Walls You Should Know
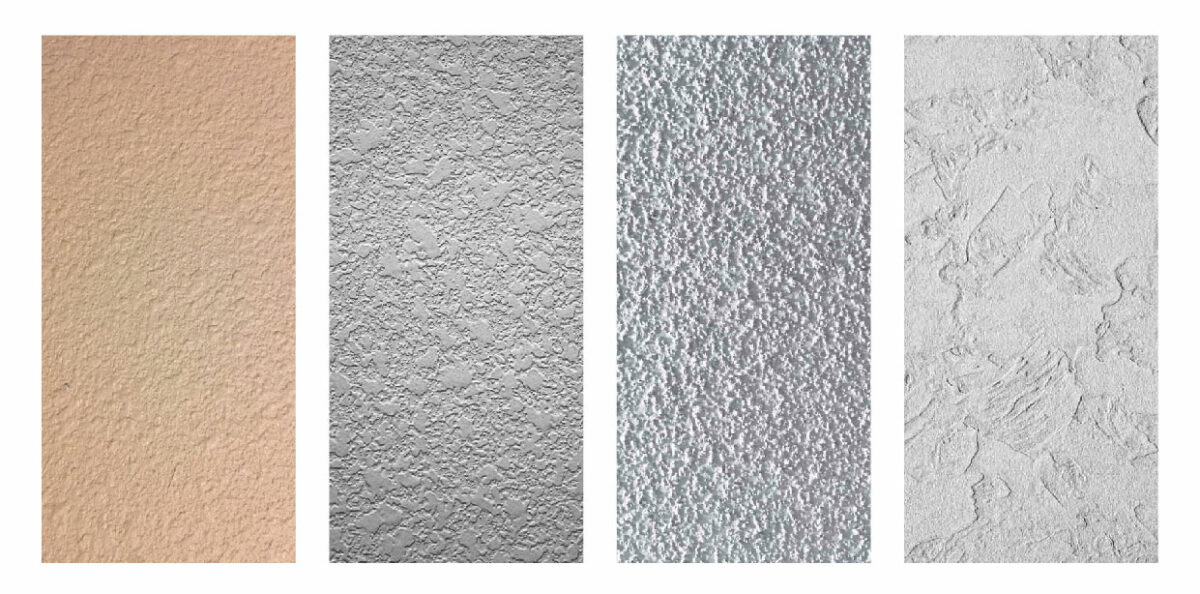
Before starting your project, it is essential to recognize the different types of textured walls you may encounter. Common textures include orange peel, knockdown, popcorn, and slap brush finishes. Each type has unique patterns and depth, which directly influence how much effort and material will be required to achieve a smooth surface.
Identifying your wall texture helps you choose the most effective method for smoothing. Heavier textures like popcorn may require more coats of joint compound, while lighter textures can be smoothed more easily. Having this understanding ensures that your approach to how to smooth textured walls is efficient and tailored to your specific situation.
Tools and Materials Needed for Smoothing Walls
A successful wall-smoothing project depends heavily on using the right tools and materials. Basic essentials include joint compound, drywall knives of various sizes, a paint roller, sandpaper, and a mud pan. Drop cloths are also important to protect floors and furniture from dust and spills during the process.
In addition to tools, safety equipment plays a critical role in the project. Wearing a dust mask and protective goggles can prevent irritation from fine particles created during sanding. Preparing properly not only improves your results but also makes the process of learning how to smooth textured walls safer and more manageable.
Step-by-Step Guide on How to Smooth Textured Walls
The first step in how to smooth textured walls is proper preparation. Begin by cleaning the wall thoroughly to remove dust, grease, and debris. Removing outlet covers and protecting nearby surfaces ensures a clean working environment. This stage is crucial because a clean surface allows the joint compound to adhere more effectively.
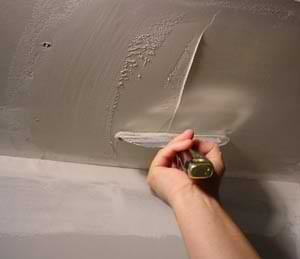
Once the wall is prepared, apply a thin layer of joint compound using a roller and smooth it out with a wide drywall knife. Allow the layer to dry completely before sanding lightly to remove imperfections. Repeat this process two to four times until the wall becomes smooth and even. Patience and consistency are key to achieving professional-quality results.
Alternative Methods to Get Rid of Textured Walls
Although skim coating is the most common approach, there are alternative methods available for those exploring how to smooth textured walls. Sanding is one option, but it can be messy and labor-intensive, especially for heavily textured surfaces. Another method involves installing a thin layer of drywall over the existing wall to create a completely new surface.
Each alternative comes with its own advantages and drawbacks. Sanding may be quicker for minor textures, while drywall overlay provides a more permanent solution but requires additional cost and effort. Evaluating these options helps you decide the best approach based on your time, budget, and desired finish.
Painting Textured vs Smooth Walls
Painting textured walls often requires more effort due to the uneven surface, which can cause inconsistent paint coverage. Special rollers designed for textured walls can help, but they may still leave shadows or uneven tones. This is why many homeowners prefer smoothing walls before applying paint.
Once you have mastered how to smooth textured walls, painting becomes significantly easier and more effective. Smooth surfaces allow paint to glide evenly, resulting in a clean and professional finish. This not only enhances the overall look of your space but also reduces the amount of paint needed for full coverage.
Wallpaper on Textured Walls: What You Need to Know
Applying wallpaper on textured walls can be challenging because the uneven surface prevents proper adhesion. Even high-quality wallpaper may not stick well, leading to bubbles, wrinkles, or peeling over time. This is especially true for peel and stick wallpaper, which requires a smooth base for best results.
To achieve a flawless look, it is recommended to smooth the wall before applying wallpaper. Learning how to smooth textured walls ensures that your wallpaper adheres properly and maintains its appearance over time. This step is essential for achieving a polished and long-lasting decorative finish.
Common Mistakes to Avoid
One of the most common mistakes when learning how to smooth textured walls is skipping the preparation stage. Failing to clean the wall or repair damage can result in uneven application and poor adhesion. Another mistake is applying joint compound too thickly, which can cause cracking and longer drying times.
Rushing through the process is another frequent issue. Proper drying and sanding between coats are essential for achieving a smooth finish. Taking your time and following each step carefully will help you avoid these errors and produce results that closely resemble professional work.
Pro Tips for a Perfect Smooth Finish
Achieving a flawless finish requires attention to detail and a few expert techniques. Using angled lighting can help reveal imperfections that may not be visible under normal conditions. This allows you to correct uneven areas before moving on to the next coat or finishing stage.
Another helpful technique is wet sanding, which reduces dust and creates a finer finish. Consistency in application and patience throughout the process are also critical. These small but effective tips can significantly improve your results when mastering how to smooth textured walls.
Cost, Time, and Effort Breakdown
The cost of smoothing textured walls can vary depending on the size of the project and the materials used. DIY methods are generally more affordable, but they require a significant investment of time and effort. Joint compound, tools, and safety gear are relatively inexpensive, making this project accessible for most homeowners.
Time is another important factor to consider. Each coat of compound requires adequate drying time, which can extend the project over several days. Despite the effort involved, learning how to smooth textured walls is a worthwhile investment that enhances both the beauty and value of your home.
Conclusion
Smoothing textured walls is one of the most effective ways to modernize your living space. With the right tools, techniques, and patience, you can transform outdated textures into sleek, elegant surfaces. The process may take time, but the results are well worth the effort.
By understanding how to smooth textured walls and avoiding common mistakes, you can achieve a professional-quality finish on your own. Whether you plan to paint or apply wallpaper, smooth walls provide the perfect foundation for any design choice and elevate the overall look of your home.
You may also read: Tools and Materials Needed for Ceiling Texturing