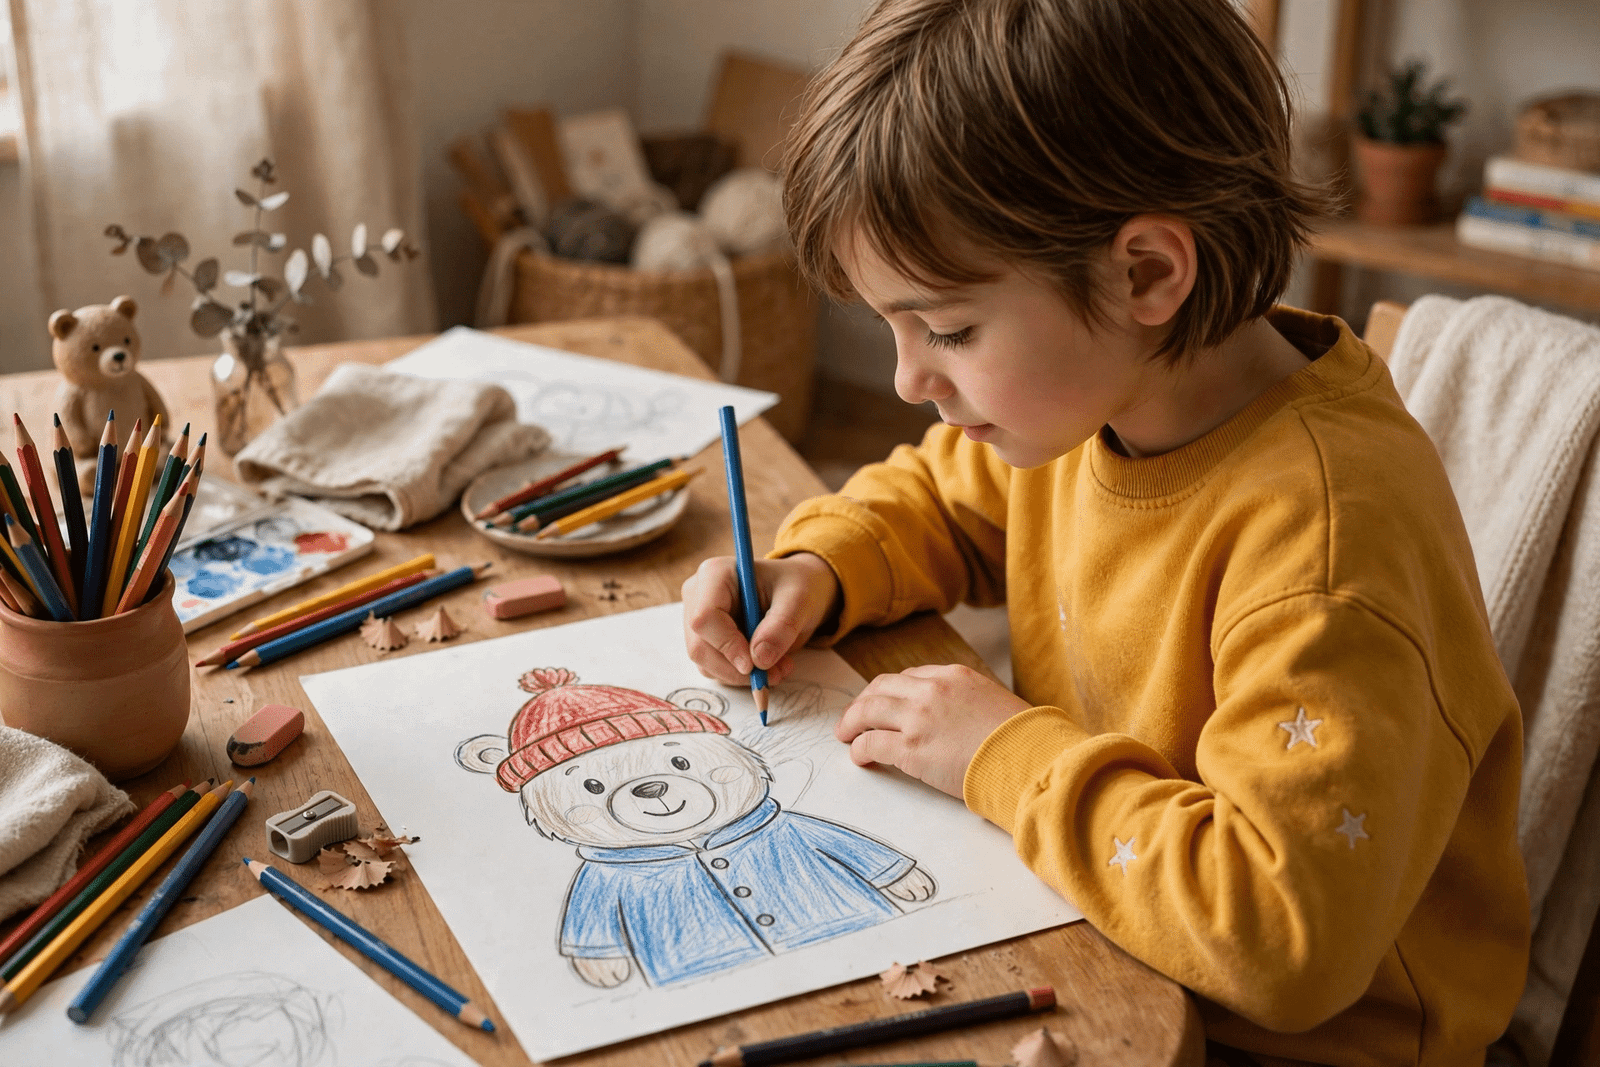
A Paddington drawing is one of the kindest first projects a new artist can choose, whether the artist is a child with a fresh sketchbook or an adult who has not picked up a pencil since school. Paddington Bear is built from soft, forgiving shapes — a round head, an oval body, a wide-brimmed hat and a duffle coat with chunky toggles — so nothing in the design demands advanced anatomy, perspective or shading before the picture starts to look right. Better still, his expression is gentle and simple: two oval eyes, a rounded nose and a small, kind smile carry the whole character.
This tutorial keeps the process exactly that manageable. You will prepare a few basic materials, build the bear from circles and ovals in clear stages, add the hat, coat and face in the right order, and then colour him in the famous red and blue. Along the way there are fixes for the mistakes almost every beginner makes with a Paddington drawing — heads that shrink, hats that float, coats that swallow the paws — plus ideas for poses and practice once the basic bear is yours. Take it slowly, draw lightly, and remember that every wobbly first attempt is part of learning.
Why Paddington Is the Perfect First Character to Draw
Paddington’s design, created by author Michael Bond in 1958 and defined visually by illustrators such as Peggy Fortnum, has survived every adaptation — books, television and the modern films — with its essentials untouched: hat, coat, suitcase, and a bear who means well. That stability is a gift to learners, because a Paddington drawing aims at a target everyone recognises, and recognition is what makes a simple sketch feel successful. When the red hat and blue coat go on, even a very basic outline becomes unmistakably him, which encourages beginners to keep practising instead of giving up at the outline stage.
There is also an emotional reason families reach for this character, and it is fair to name it: Paddington stands for kindness, politeness and finding home in a strange place, so drawing him tends to feel calm rather than competitive. Children who might be frustrated by superheroes with complicated muscles relax with a bear whose body is essentially a friendly potato in a coat. The official Paddington website collects stories, films and family activities built around that same warmth, and it is a lovely place to visit after a drawing session, when young artists want more of the character they have just created.
Materials and Preparation
You need far less than an art shop would like you to believe. For a pencil Paddington drawing, gather one HB pencil for light construction lines, one softer pencil or a fine liner for the final outline, a good eraser, a sharpener and a sheet of smooth paper or a sketchbook page. Smooth paper matters more than expensive paper at this stage, because rough textures fight against clean curves and make erasing messy. A ruler is unnecessary — Paddington contains almost no straight lines — but a coin or a mug can help a very young artist trace a first confident circle for the head.
For colour, pencils are the friendliest choice for beginners, because they layer gently and forgive hesitation; felt tips give bolder results but punish mistakes; and watercolour suits older children who want a storybook softness. You will principally need a warm red for the hat, a deep blue for the coat, and browns and creams for the fur and muzzle, plus black for the nose, eyes and toggle details. Set up at a table with decent light, sit the artist comfortably, and keep a reference picture of Paddington visible — professional illustrators use references constantly, and copying his proportions from a picture is learning, not cheating.
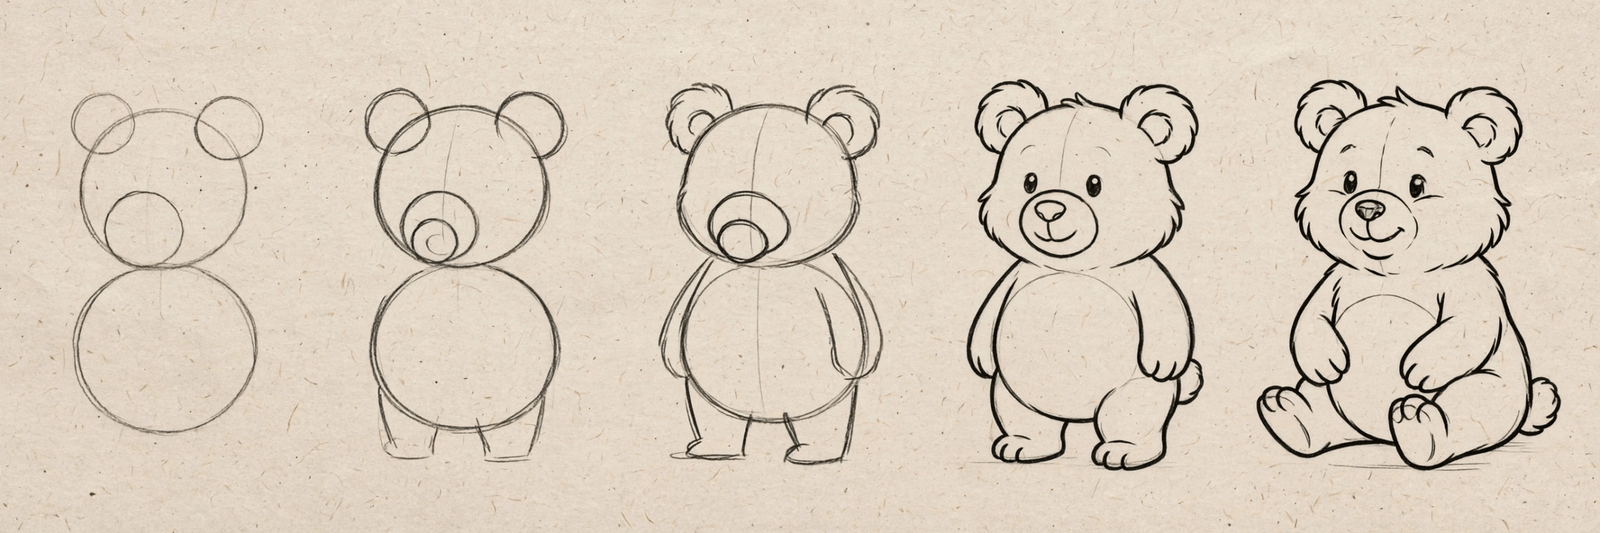
Step-by-Step Paddington Drawing Tutorial
Stage one is pure construction, drawn so lightly that the lines can almost be breathed away. Draw a circle for the head, slightly wider than it is tall. Beneath it, overlapping a little, draw a rounded oval for the body — think of a plump pear shape, narrower at the top where it meets the head. Add two small rounded ears as half-circles at the top corners of the head. Then mark a soft cross of guidelines on the face: a vertical line down the centre and a horizontal line about halfway down, which is where the eyes will sit. Every Paddington drawing stands or falls on these humble shapes, so take a moment to check that the head is generously large — his charm depends on it.
Stage two adds face and clothing. On the horizontal guideline, place two small vertical ovals for the eyes, spaced about one eye-width apart. Below them, centred, draw a rounded triangle or soft oval for the nose, and underneath it a short line curving gently up at both ends for his kind, slightly puzzled smile; a small muzzle area can be suggested with a faint oval around the nose and mouth. Now the famous outline: draw the hat as a wide, shallow dome sitting on the head with a broad brim curving down at the sides, then the duffle coat as two long curves from the shoulders to below the body oval, with a row of toggle fastenings — capsule shapes on short loops — down the front, arms as rounded tubes ending in simple paws, and feet peeping out beneath the coat hem. Ink or darken the final lines, let them settle, and erase the construction lines.
Colouring Your Paddington
Colour in the order that protects your work: lightest first, darkest last, and leave the face until you are confident. Begin with a pale cream or light tan across the muzzle and the inner ears, then build the fur in soft brown layers everywhere the coat and hat do not cover, keeping strokes in one direction so the fur looks brushed rather than scribbled. A Paddington drawing rewards restraint here — real fur shading can wait for later projects, because flat, tidy colour inside confident outlines is exactly what gives children’s book illustrations their charm, and it is achievable in a first sitting.
Now the signature colours, which do the emotional heavy lifting of the whole picture. Fill the hat with a warm, slightly orangey red, pressing a little harder beneath the brim to suggest shadow, and fill the coat with a strong royal blue, leaving the toggles pale wood-brown with dark cords. The nose and eyes go solid black, with a tiny white highlight dot left in each eye if your pencil allows — that single speck is what makes him look alive rather than flat. If you are feeling ambitious, add his brown suitcase beside one paw and the famous tag around his neck asking the world, in effect, to please look after this bear.
Common Mistakes and How to Fix Them
The commonest mistake in a Paddington drawing is starting with the details: perfecting an eye, a toggle or the hat’s curve before the head and body are the right size relative to each other. The picture then cannot be rescued, because the details are sitting on a broken structure. The fix is discipline in stage one — shapes first, always, and details only when the proportions please you. The second commonest mistake is a head that is too small and dignified. Paddington’s head should look almost too big for the coat; if your bear looks like a sensible adult in fancy dress, enlarge the head and shorten the body, and he will soften instantly.
Hats cause their own troubles: drawn too high, they appear to float; drawn too narrow, they turn into a bowler and the character vanishes. Anchor the hat by letting the brim overlap the top of the head and the ears tuck beneath it, and make the brim wider than feels natural — his hat is a generous, floppy thing, not a neat one. Finally, paws and feet often disappear entirely into the coat. Solve this by deciding early where the coat ends: arms emerge from the coat’s sides at about its halfway point, and two rounded feet must show beneath the hem, or your bear will look as though he is standing inside a blue bell.
Poses, Practice and Next Steps
Once the standing bear is reliable, variations turn practice into play. Draw Paddington waving one paw, holding his suitcase in both paws, lifting a marmalade sandwich, or peering out from under an umbrella — each pose reuses the same head, hat and coat, changing only the arms and the angle of the head, so progress is fast and confidence compounds. Families often enjoy a sequence project: the same bear drawn once a week for a month, kept in order, so a child can literally see their own improvement lined up on the fridge, which teaches more about learning than any single lesson can.
For steady improvement, short and frequent beats long and rare: ten minutes of daily sketching will carry a beginner further in a school term than one heroic hour a month. Practise the component shapes on their own — pages of circles, ovals and gentle curves — because a Paddington drawing is only ever those shapes wearing a costume. Then graduate to other simple storybook animals using the identical method, and to drawing from photographs of real bears, where the proportions fight back a little. Keep every attempt, date them, and be kind about the early ones: they are the before pictures of a skill that lasts a lifetime.
Conclusion
A successful Paddington drawing needs nothing exotic: a circle, an oval, a kind face, a big red hat and a blue duffle coat, assembled in the right order with a light hand. Work through the stages — construction shapes, facial features, hat and coat, then calm, tidy colour — and the bear who arrives on your page will be recognisably the bear from Darkest Peru, whether it is a child’s first attempt or an adult’s first drawing in twenty years. Keep the early versions, because watching them improve across a month of small sessions is half the pleasure.
Above all, treat the exercise the way Paddington himself would: politely, patiently and with a marmalade sandwich somewhere nearby for afterwards. Drawing is a skill built entirely from attempts, and this bear forgives every one of them. If your family enjoyed this tutorial, Pogeo has plenty more gentle explainers to explore together, from our guide to rugby positions for young sports fans onward.
Frequently Asked Questions
How do beginners start a Paddington drawing easily?
Start with construction shapes, drawn very lightly: a circle for the head, a plump oval beneath it for the body, and half-circle ears at the top corners of the head. Add a gentle cross of guidelines on the face to place the eyes evenly, then build the face, hat and duffle coat on top of that structure in stages. The secret of an easy Paddington drawing is refusing to draw any detail until the simple shapes look right, because every charming feature of the character sits on those circles and ovals.
What materials do I need to draw Paddington?
Very few: an HB pencil for light construction lines, a softer pencil or fine liner for the final outline, an eraser, and smooth paper or a sketchbook. For colour, pencils are the most forgiving choice, and you mainly need a warm red for the hat, a deep blue for the coat, browns and cream for the fur and muzzle, and black for the eyes, nose and toggles. A reference picture of Paddington nearby is genuinely useful at every level, including for experienced artists learning a new character.
Why is Paddington good for children learning to draw?
Because his design is simple, symmetrical and forgiving: a round head, an oval body, a big hat and a straight-sided coat, with a face made from two oval eyes, a rounded nose and one gentle smile. There are no hands with fingers, no complicated clothing folds and no difficult angles, so children experience the reward of a recognisable, much-loved character very early. That early success matters pedagogically — it converts drawing from a test they can fail into a game they want to repeat, which is how skills actually grow.
How do I draw Paddington’s hat and coat correctly?
Anchor the hat low on the head, with a wide brim that overlaps the head’s top and tucks the ears beneath it, and make the crown a shallow, slightly floppy dome. The coat should hang in two long, gentle curves from the shoulders to below the body, fastened down the centre with chunky toggles on loops, with arms emerging at the sides and rounded feet showing beneath the hem. If the hat floats or the feet vanish, the bear stops reading as Paddington, so check those two points before colouring.
Can I do a Paddington drawing digitally instead of on paper?
Yes, and tablets are excellent for beginners because layers allow you to keep construction lines, outlines and colour separate, and mistakes can be undone without damaging the page. Use one layer for the light shapes, a second for the clean outline and a third beneath the outline for flat colour in his red-and-blue scheme. The stages are identical to the paper method — shapes, features, costume, colour — so skills transfer in both directions, and many families sketch on paper first and colour the scanned drawing digitally together.
And for parents building a little home curriculum of clear, friendly guides, our complete rugby positions breakdown is another page worth bookmarking alongside this one.